

Subscriber Management
The WhatsApp Subscriber Manager is an efficient tool for handling and organising WhatsApp contacts and subscribers. It helps businesses, marketers, and organisations streamline messaging campaigns and communications with large subscriber groups. Users can categorise and manage contacts, enabling the sending of personalised messages, scheduling broadcasts, and analysing campaign performance. This tool ensures you stay connected and engaged with your WhatsApp audience effectively.
Accessing Subscriber Manager
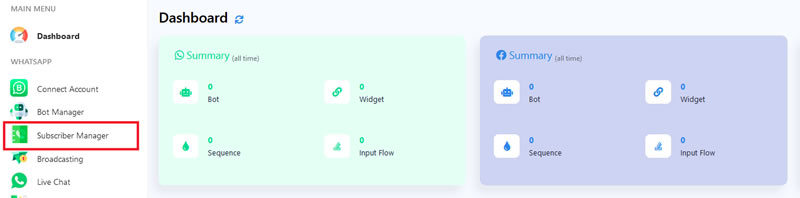
- To access the Subscriber Manager, click Subscriber Manager from the dashboard’s left navigation menu.
Managing Labels
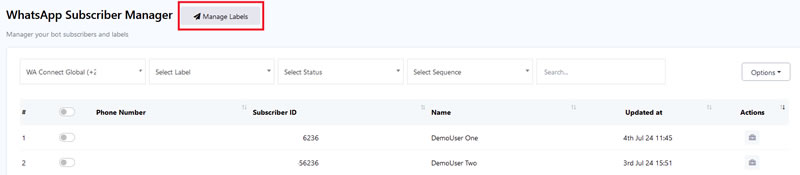
Labels are used to segment the subscriber list with tags. To manage labels, click on the Manage Labels field in the Subscriber Manager. You can create and delete labels here.
- Creating a Label – Click the Create button in the Bot Label section.

- Enter the name for the label in the Label Name field.
- Choose the bot account in the Select Bot field.
- Click the Save button. A success message will appear.

- Close the Create Label form.
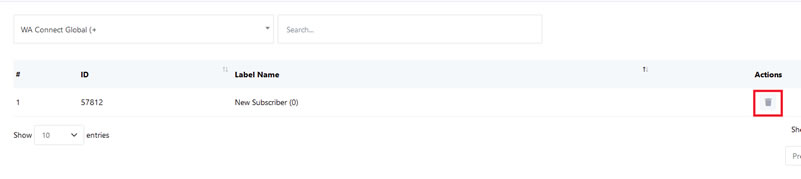
- Deleting a Label – Click the action button (Delete icon) associated with the label name to delete a label.
Searching for Subscribers
- From the left menu bar, navigate back to Subscription Manager.
- Use the search bar and different options on the Subscriber Manager page to search for subscribers.
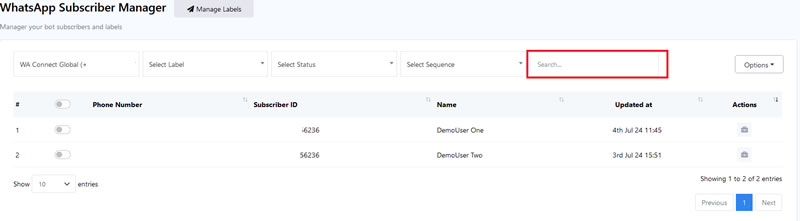
- The search function also allows you to filter searches by either labels, subscriber status or any sequence a subscriber is associated with.
Using Subscriber Options Menu
- Click on the Options button for various tasks. A drop-down menu will appear.
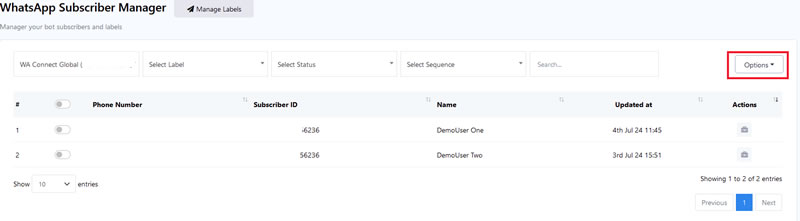
Download as CSV
- Click Download as CSV to export the subscriber list into a CSV file.
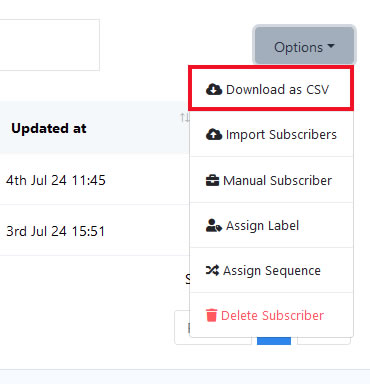
Importing Subscribers
- Select Import Subscribers from the options menu.
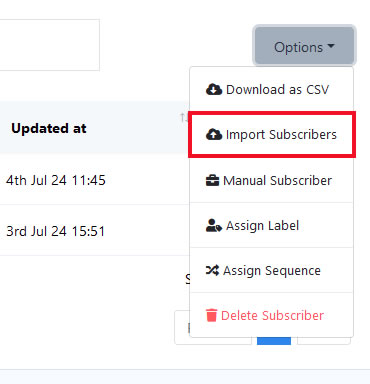
- You can download a sample CSV file to ensure you format the import file correctly before importing.
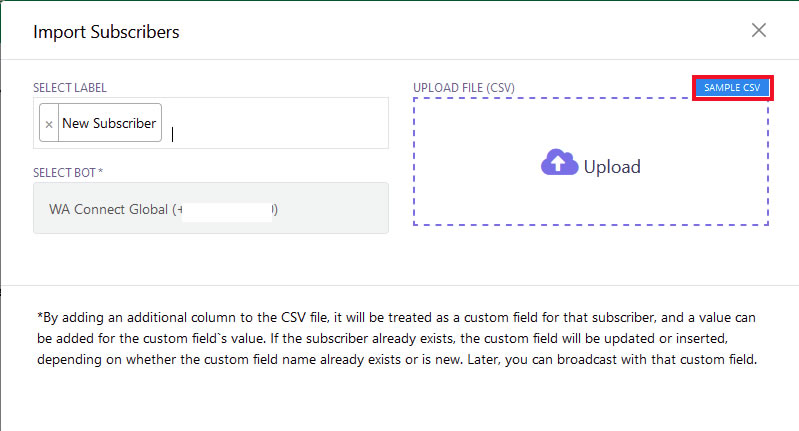
- Preparing the CSV import file
- Column A is reserved for the phone number and the column heading must be – phone_number. The number must include the country code.
- Column B is reserved for the subscriber name and the column heading must be – name.
- By adding additional columns to the file, these additional fields will be imported as custom fields.
- When adding additional columns the column headings must be in lowercase. Spaces are allowed
- If the subscriber already exists, the custom field will be updated or inserted, depending on whether the custom field name already exists or is new.
- In the Import Subscribers form, Select a label if required, also select the correct Bot (linked WhatsApp number) to import the subscribers to.
- Click on Upload and select the newly created CSV import file.
- Sample data will be shown as a preview to confirm that the file is in the correct format.
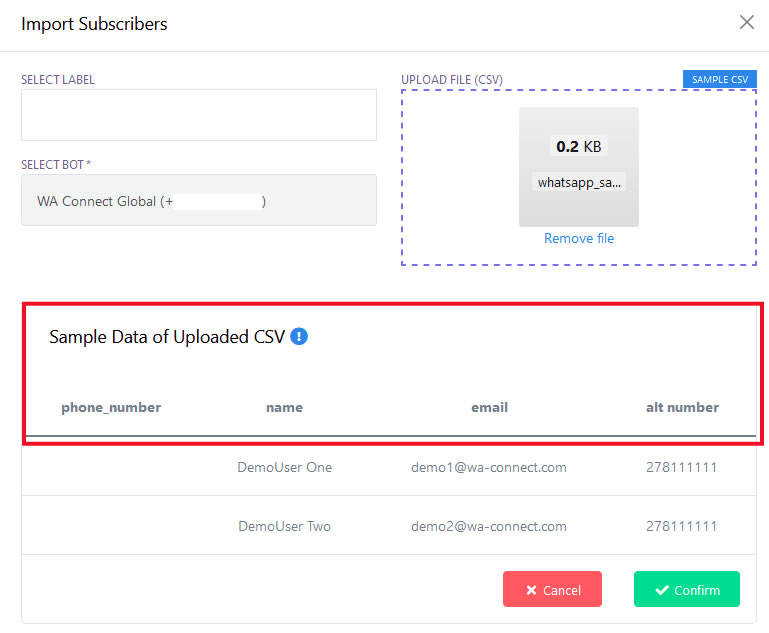
- If the data to be imported is correct, click on Confirm.
- A success message will appear and your subscribers have been added and updated.
Adding Subscribers Manually
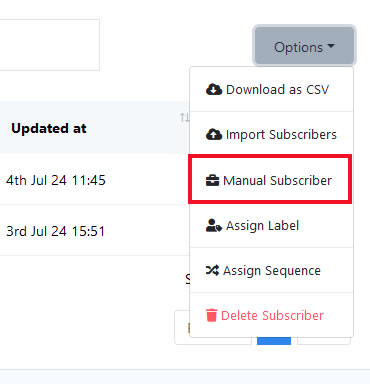
- Select Manual Subscribers from the options.
- Enter the subscriber’s name and phone number, the phone number must include the country code without the + sign.
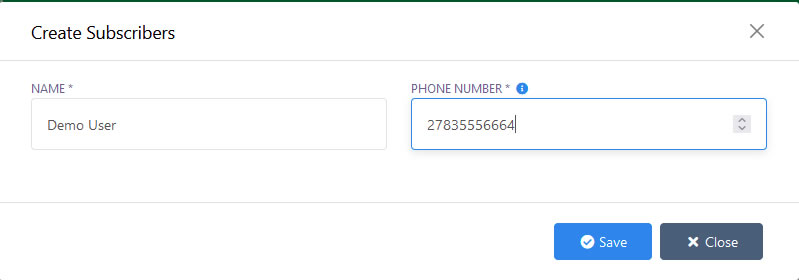
- Click the Save button, and a success message will appear and the subscriber is added to your subscriber list.
Assigning Labels
- To assign labels to subscribers you first need to select the subscriber you wish to assign the labels to by sliding the selection ion option to the left of their number.
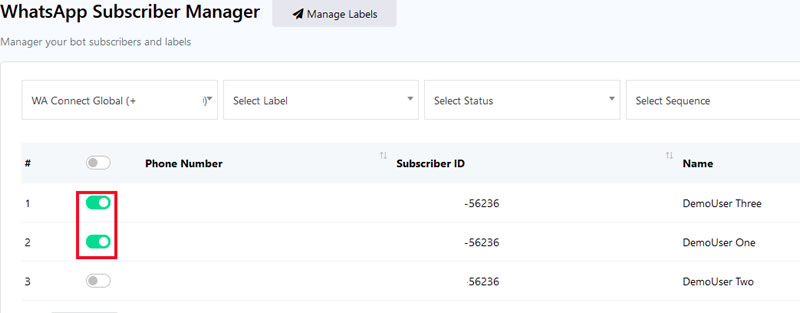
- Select Assign Label from the options.
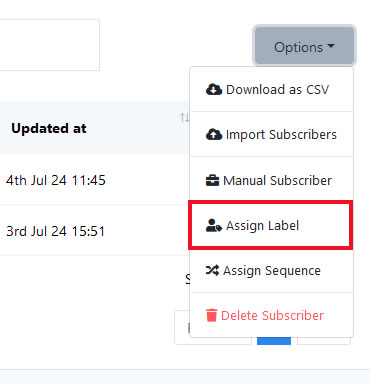
- In the Assign Label form, choose a label or labels and click the Assign button.
Assigning Sequences
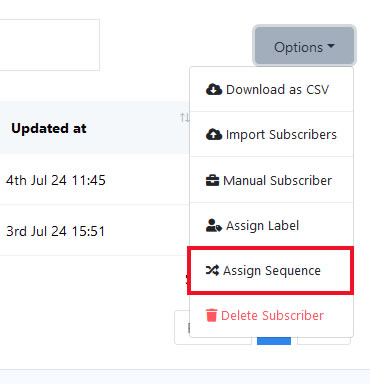
- To assign a sequence to subscribers you first need to select the subscriber you wish to assign a sequence to by sliding the selection option to the left of their number.
- Select subscribers and click on the Assign Sequence option to assign sequences to subscribers.
Deleting Subscribers
- To delete subscribers you first need to select the subscriber you wish to delete by sliding the selection option to the left of their number.
- Click on the Delete Subscriber option.
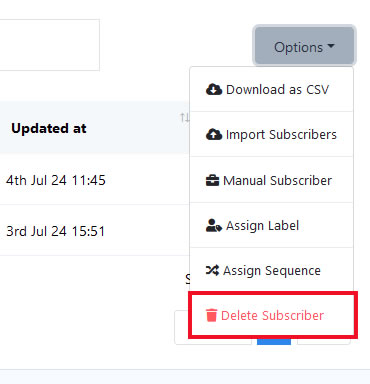
- In the warning dialogue, click the Delete button. A success message will appear.