

WhatsApp Bot Manager
WhatsApp Bot Reply
- Access the Bot Manager by navigating to the Bot Manager from the dashboard’s left-side menu.
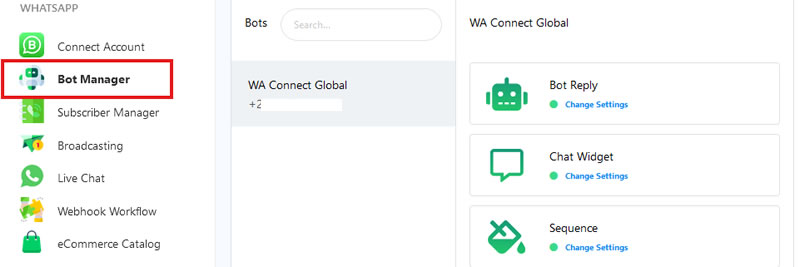
- Select the Bot Reply option.
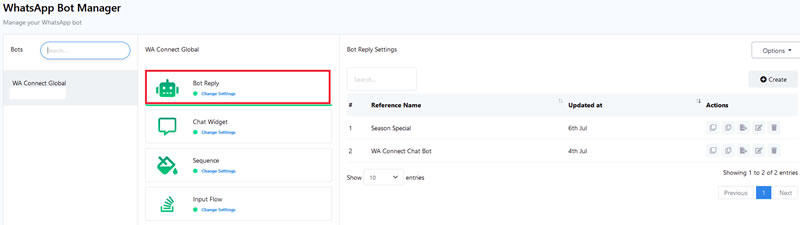
- Click on the Create button located in the upper right-hand corner, and ensure that you have selected the Bot Reply option.
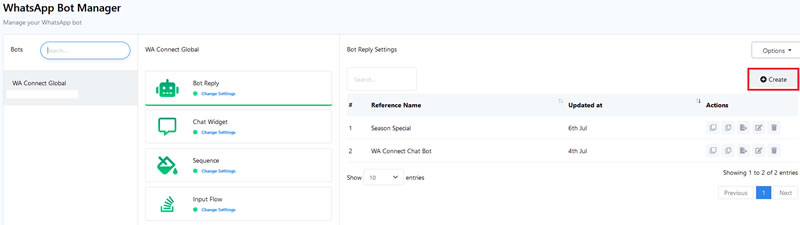
- A new window will open with the Bot Builder that will allow you to construct a WhatsApp Bot.
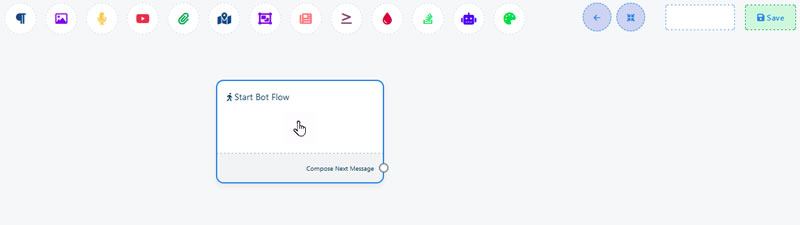
Bot Builder
There are 3 ways you can add components to your bot:
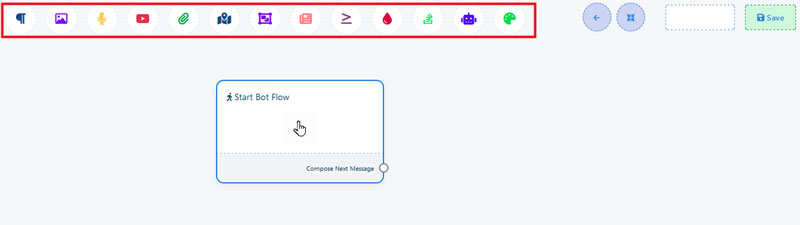
- Drag components from the Top menu and drop them into the Editor section.
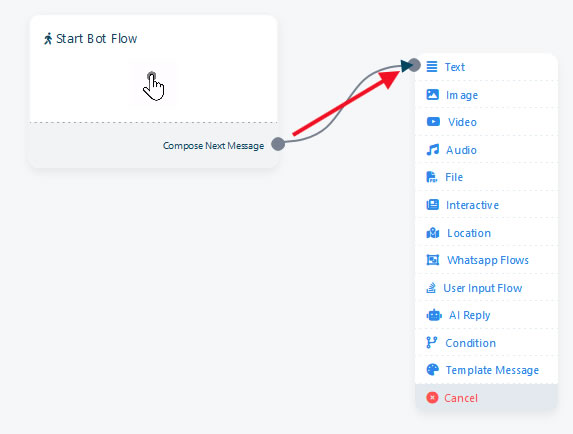
- Drag a connector from the socket and select the required component from the list.
- Right-click on the editor to open a list of components and select the desired component.

- Configuration: Adjust the settings of each component according to your specific requirements.
- Connect Components: Create a functional bot flow by linking the components together.
Start Bot Flow
- In the Editor section, you will find a key component called the Start Bot Flow. This is the foundation for building your bot.
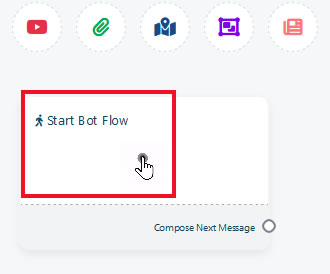
- Double-click on this component to configure it.
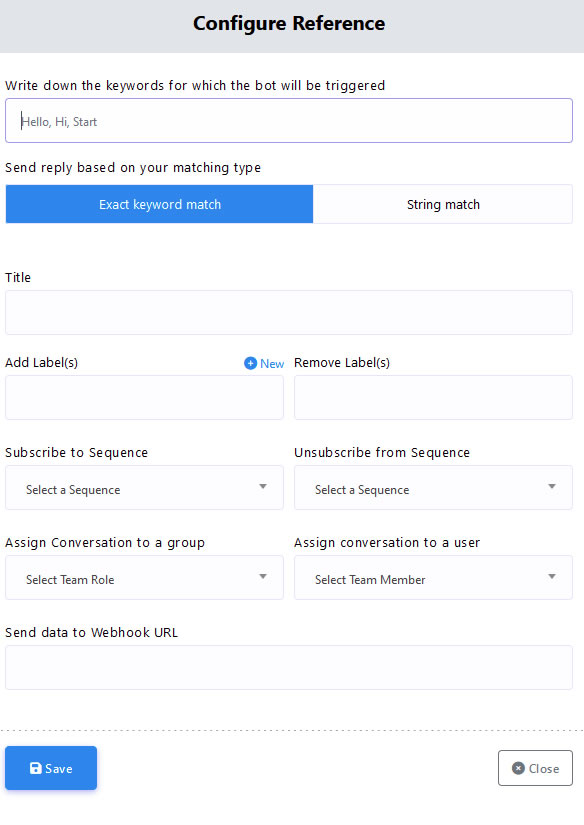
- While there are ten fields available, Keyword Triggering, Matching Type, and Title are required.
Configuring Start Bot Flow
- Keyword Triggering (required field): Enter a list of comma-separated keywords in the first field. These keywords will trigger the bot when a user inputs matching text.

- Matching Type (required field): Choose between Exact Keyword Match or String Match. By default, Exact Keyword Match is selected, which triggers the bot only if the user’s input exactly matches the keyword. The String Match option triggers the bot if the user’s input partially matches the keyword.

- Title (required field): Assign a title to your bot in the Title field to name your bot.

- Add Labels: Use labels to categorize your audience into different segments, like demographics or interests, for targeted messaging.

- Remove Labels: Remove labels from users as needed.

- Subscribe to Sequence: Send a series of automated messages over time to onboard new subscribers, nurture leads, or re-engage inactive users.

- Unsubscribe from Sequence: Unsubscribe users from any sequence.

- Assign Conversation to a Team Role: Assign conversations to specific Team Roles within your organisation.

- Assign Conversation to a Team Member: Assign conversations to individual team members.

- Send Data to Webhook URL: Add a webhook link to send bot data to a specified URL for easy data storage.
Webhook: webhook is a feature that allows you to connect your WhatsApp bot to external systems or services, enabling automatic data transmission and communication between your bot and other compatible software. This integration helps automate processes and enhances the functionality of your chatbot.

- Once you’ve filled out the required fields, click the Save button to save your settings. Use the Close button to cancel if necessary.

Compose Next Message
- After setting up the Start Bot Flow, you’ll see sockets like Compose Next Message. These allow you to add various components, such as text, images, audio, video, or files.
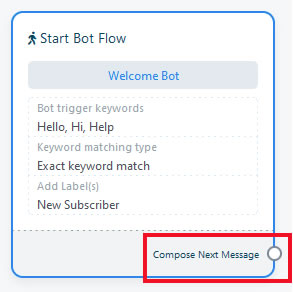
- You can add components without dragging them from the top menu. Instead, drag from the sockets of any component and drop it onto the editor.
- Component Selection: A menu will appear with various components and a cancel button. Select a component to add it to the editor, connected to the parent component.

- Click the Cancel Button if you decide not to add a component.
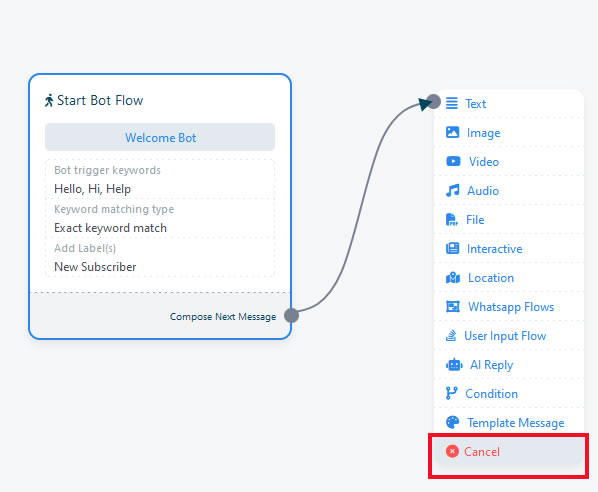
Components Explained:
Text Component:
- Select the Text Component from the options to add it to the editor.
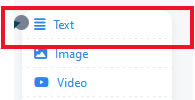
- Double-click on the text component to open the Configure Text Message sidebar.
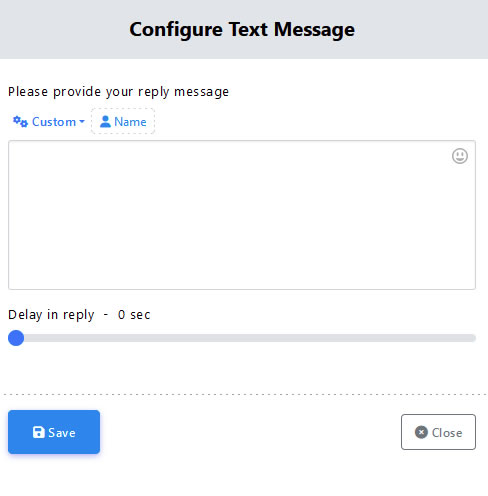
- Enter your reply message in the text field.
- You can include dynamic elements like the user’s first name or custom field variables.
- Set a delay time for your reply if needed.
- Click the Save button to apply the changes.
- If not yet connected, connect the text component with the Start bot flow component.
Image, Audio, Video, and File Components
- Select Either Image, Video, Audio or File Component from the Component Menu.
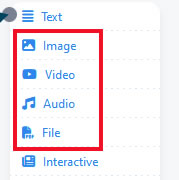
- Double-click on the Image, Video, Audio or File component to open the Configure sidebar.
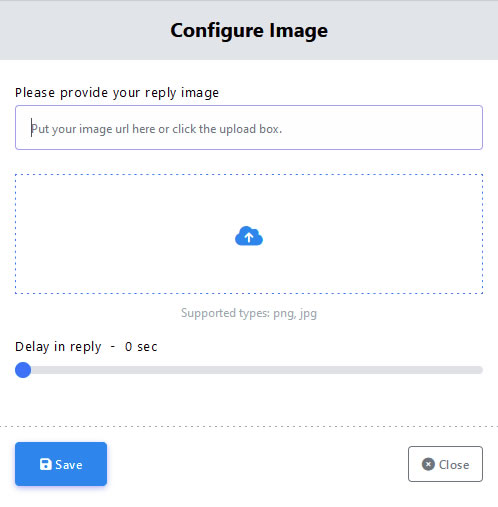
- To add these components, provide either a URL to the media location or upload the media file.
- If not yet connected, connect the media component with the Start bot flow component.
Interactive Components:
- Use interactive elements like buttons, images, videos, forms, quizzes, and polls to make conversations engaging.
- Select the Interactive Component from the options to add it to the editor.

- Double-click on the Interactive component to open the Configure sidebar.
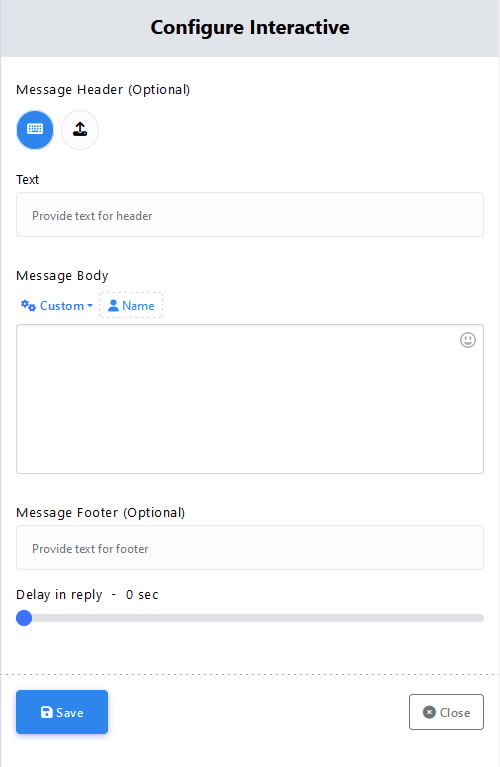
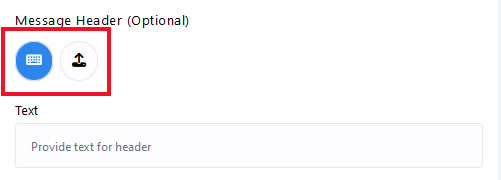
- Provide a message header for the interactive component. This is an optional field and can either be a text header or a media header.
- Type in a message that will be sent in the message body.

- Provide a text footer for your message. This is also an optional field.

- Set a delay time for your reply if needed.

- Click the Save button to apply the changes.
- If not yet connected, connect the Interactive component with the Start bot flow component.
- From here you will see that you can add additional interactive functions to the flow.
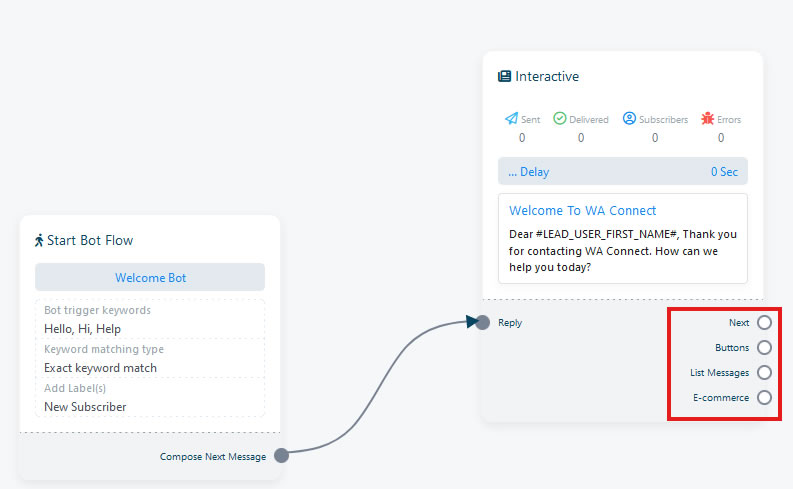
- Drag from the interactive component labelled with Next to open the component menu.
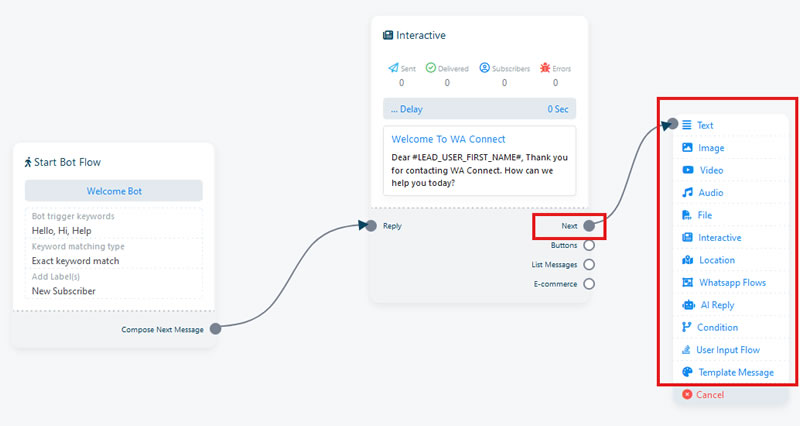
- From the component menu, select a component you want to add to the flow and configure this component as explained in this document.
- To add buttons to the Interactive Component, just drag from the buttons socket to add a button to the flow. You can add multiple buttons to the interactive flow.

- Double-click on the button component to open the configure sidebar.
- Add a name to the button.

- Select what must happen when a user clicks the button

- Select Send a message to respond to the request
- Select Start a Flow to link the button to another chat bot you created
- Select Default Action Buttons to assign a default button to the reply
- Add a List Message to the Interactive Component
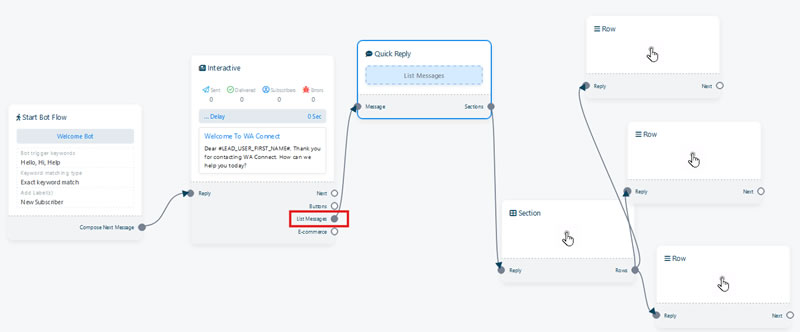
- This action will create a Quick Reply List message that behaves similarly to a menu on WhatsApp.
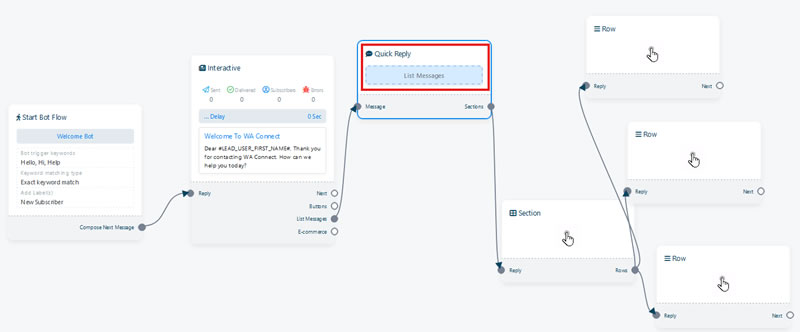
- Double-click on the Quick Reply component and a button name.
- Double-click on the Section component and add a title to it.
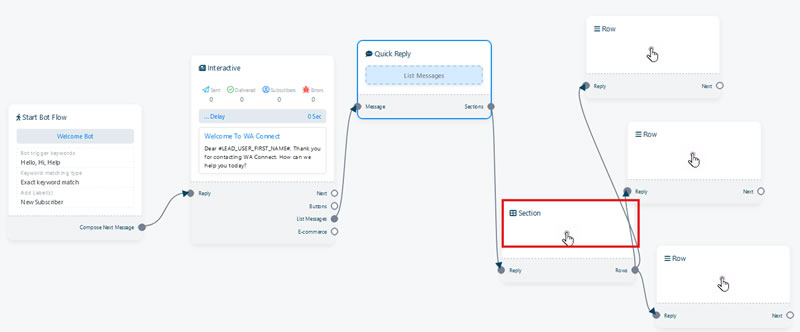
- By default, the list message component adds 3 rows to the list. You can remove and add more rows if required.
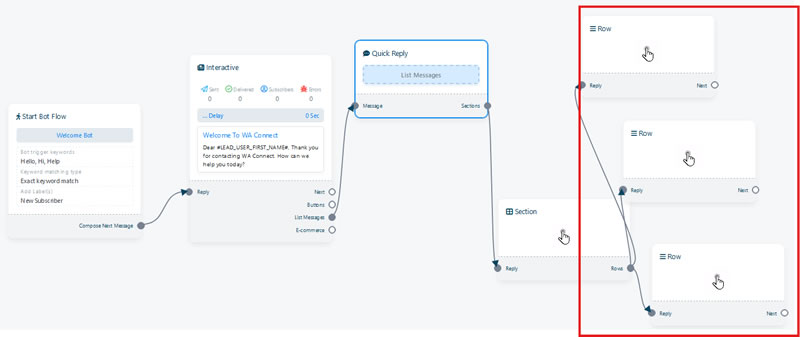
- Double-click on the row component to add a title as well as a description for the row.
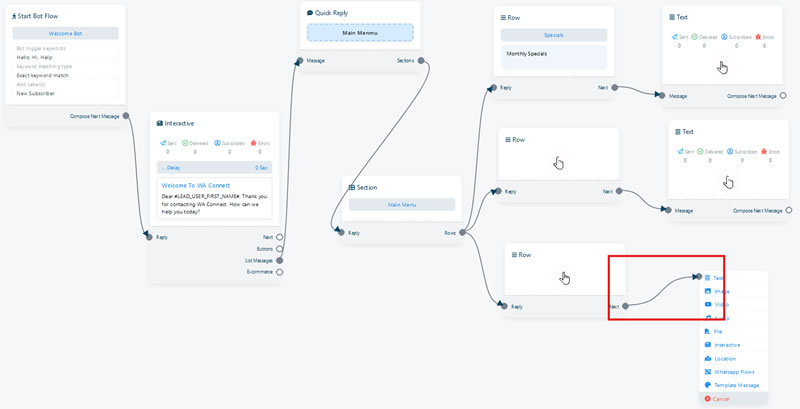
- Complete the List message by adding a new component to the end by dragging from the Next socket to open the component menu and select the appropriate component to add.
- Add the E-commerce component to the bot flow.
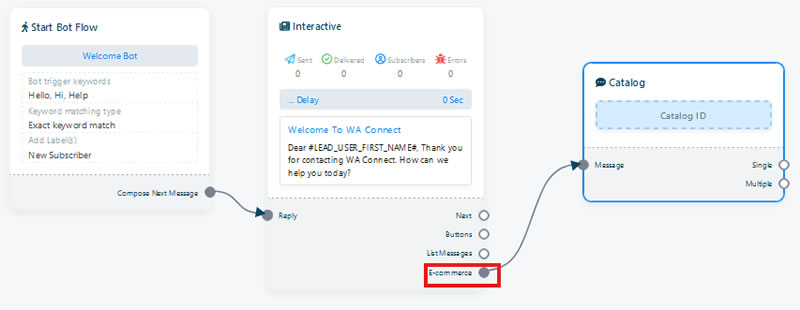
- Configuring E-commerce:
- From the E-commerce socket, drag your mouse to the flow builder to add the Catalog element.
- Double-click the Catalog element to open the configure settings.

- Select your WhatsApp catalogue ID in the Catalog ID field and click Save.
- Customize the catalogue by choosing between single or multiple products and giving each section a name. You`ll also need to select the products you want to include in your e-commerce store.
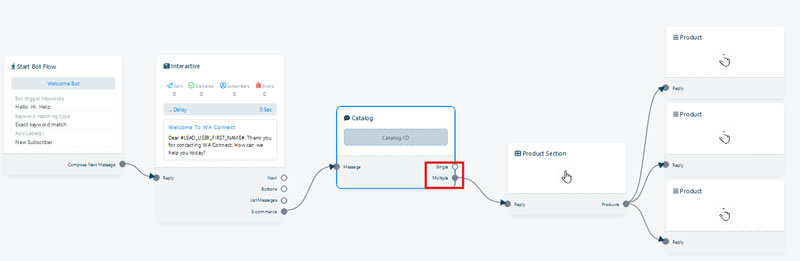
- Click Save in the top right corner to save the changes and publish your chatbot.
Condition Components
- Use the Condition component to create bots with conditional logic.
- Drag from the socket from any component to pop out the menu.

- Select the condition component.

- Double-click to open the configure window.
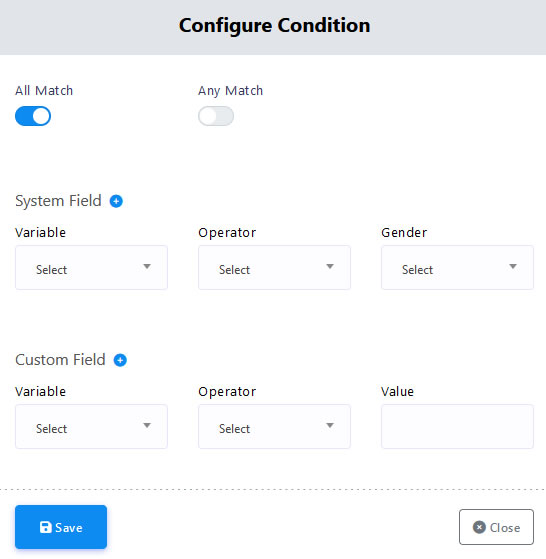
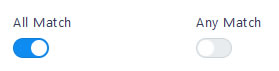
- Choose between All Match or Any Match to specify criteria for actions or responses.
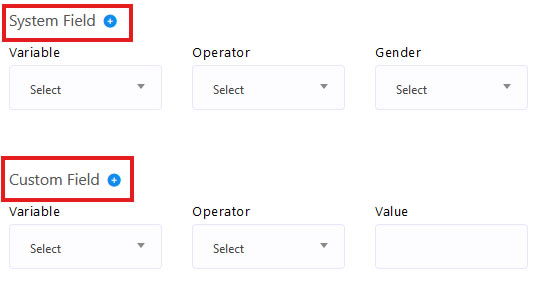
- Apply conditions to system field data or custom fields and click save.
- Add two Text elements to your chatbot flow. Connect one Text element to the True socket and the other to the False socket.

- The True socket message can inform users that updated information will be sent to their email.
- The False socket message can notify the user that their email is not in the system and prompt them for their email address using a User Input Flow message.
- The bot will send the True socket message if the condition is met. If not, it will prompt the user for more information using the False socket message.
Sequence Messages
- Automate sequences of messages over time for enhanced user interaction.
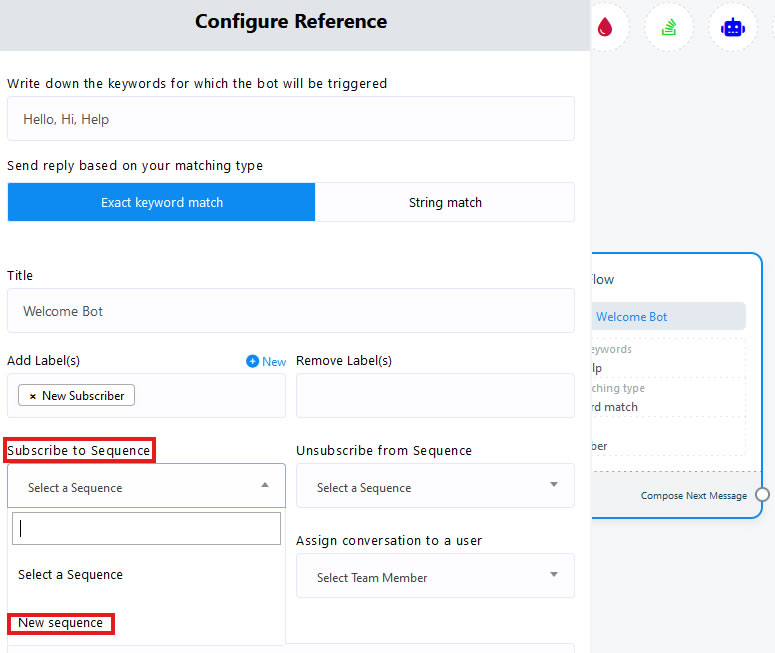
- Double-click on Start Bot Flow or any button component and select Subscribe to Sequence. Choose a new sequence and save the changes.
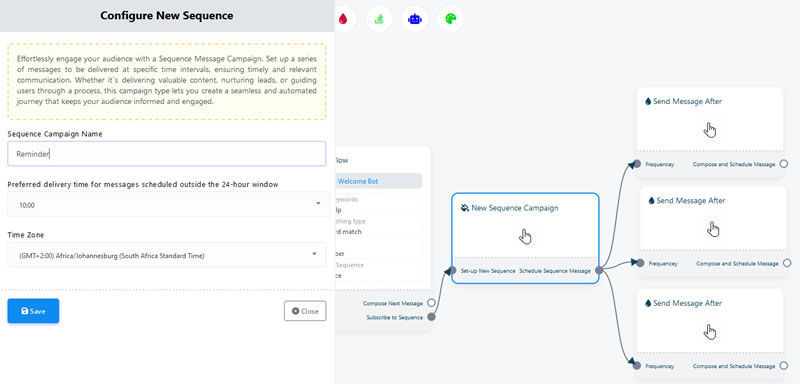
- Name the Sequence Campaign and set the delivery timing.
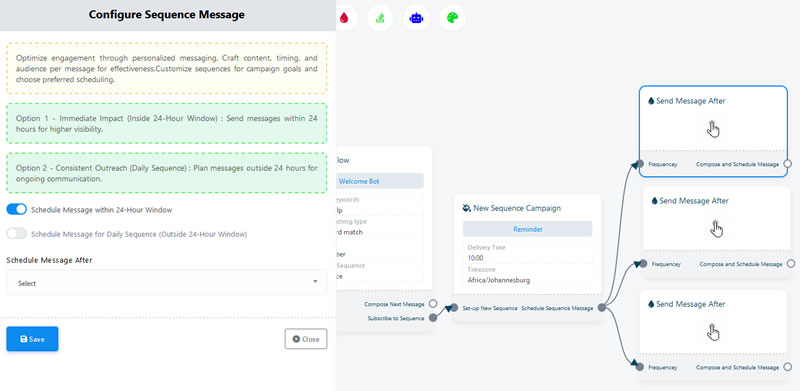
- Configure the Send Message After components for scheduling messages within or outside a 24-hour window.
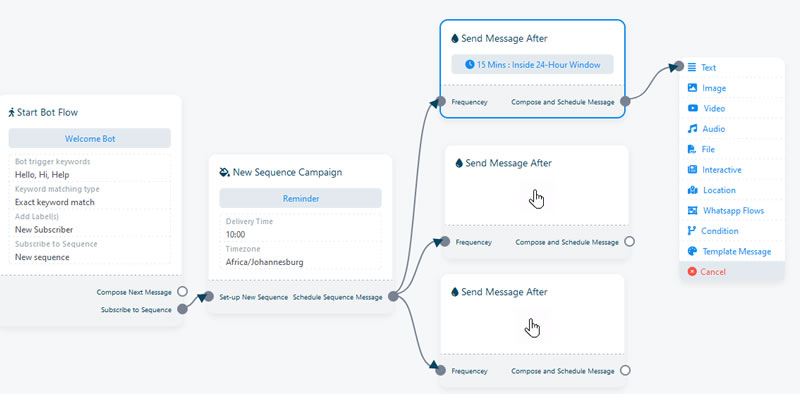
- Connect the sequence components, such as text, image, audio, or interactive elements.
User Input Flow
- Collect data from users through interactive flows.
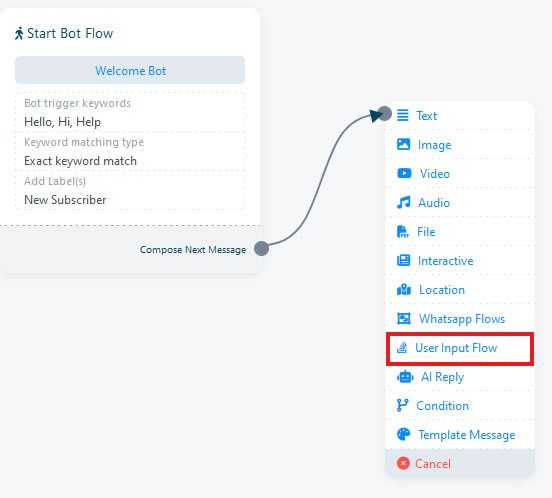
- Drag from the socket from any component to pop out the menu.

- Select User Input Flow.
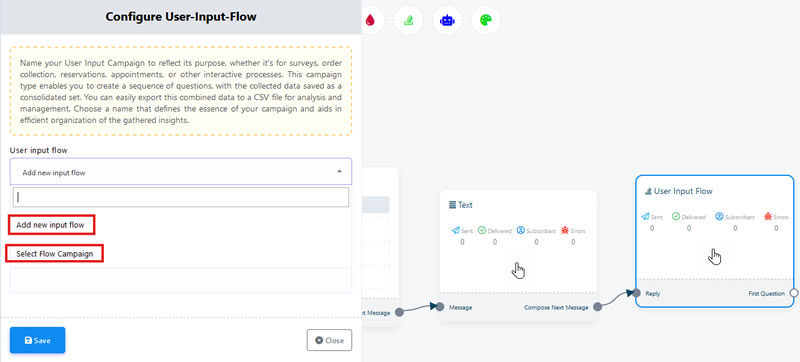
- Double-click the component to open the configure window and select either Add new input flow or Select an existing flow campaign.
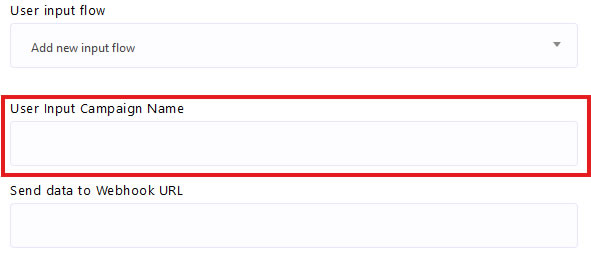
- If you select Add new input flow, name the campaign and optionally add a webhook URL.
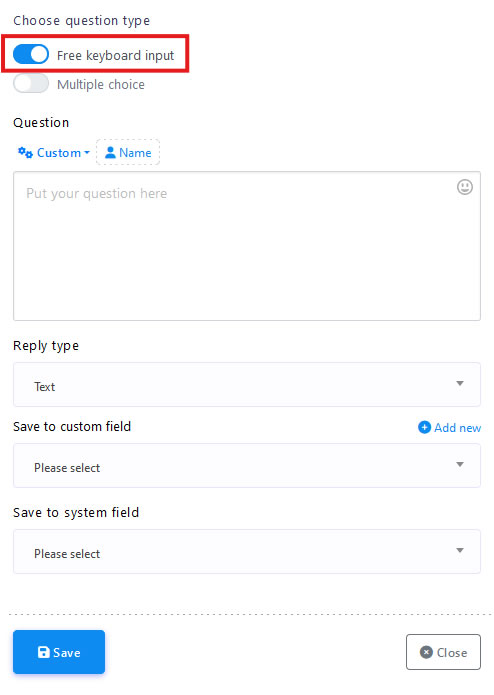
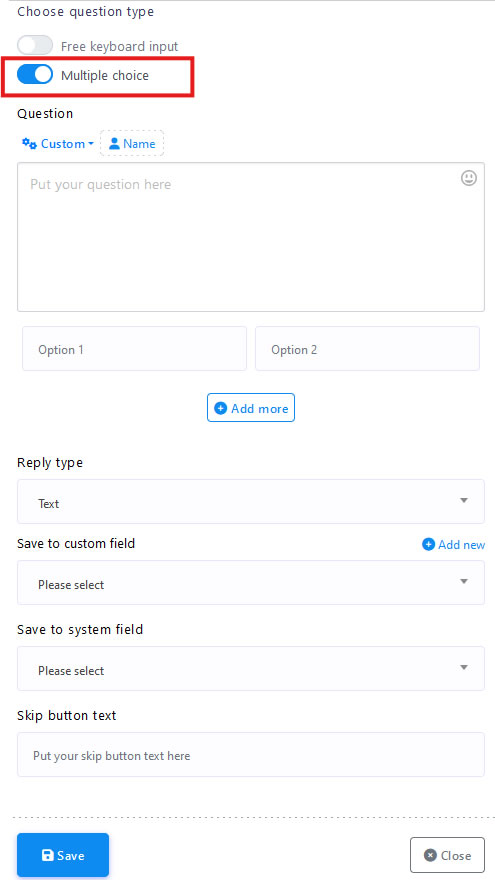
- Add questions using Free Keyboard Input or Multiple Choice options.
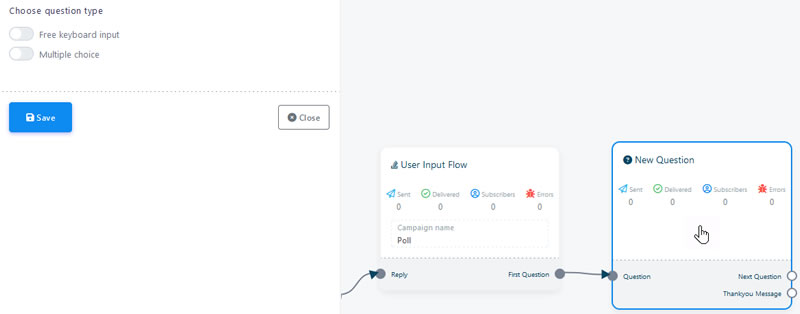
- Free Keyboard Input: Set the question, reply type, and save responses to custom or system fields.
- Multiple Choice: Provide predefined answers, set reply types, and save responses accordingly.
Clone and Delete Components
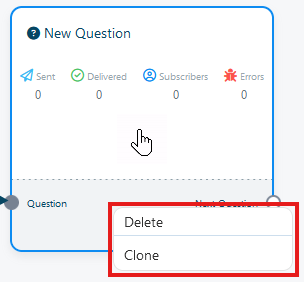
- Right-click on any component to clone or delete it. A drop-down menu will offer options to Clone or Delete the component.
This comprehensive guide will help you effectively configure and utilize various components in the Bot Manager, enhancing the functionality and engagement of your chatbots.